Python Installation Made Easy: How to Install the Latest Version of Python on Your Computer
I'm JMN (Jaffery Mwangi Ndisho), and I'm thrilled to share my passion for data analytics and programming with you. With a background in business and IT, I've always been fascinated by the power of algorithms and their ability to transform data into insights. Through this blog, I hope to share my learning journey and practical knowledge with you, as well as explore new techniques and applications in the field. Join me on this journey and let's discover the world of data analytics and programming together!
In our previous article, we explored the history of Python and looked at its many features and integrated development environments (IDEs). In this article, we'll be delving into the practical side of Python and showing you how to install it on your computer. For this tutorial, we'll be focusing on the installation process for Windows users. However, if you're using a different operating system like Linux or Mac OS, don't worry – you can still follow along! Just be sure to download the version of Python that is compatible with your operating system before starting the installation process.
Step 1
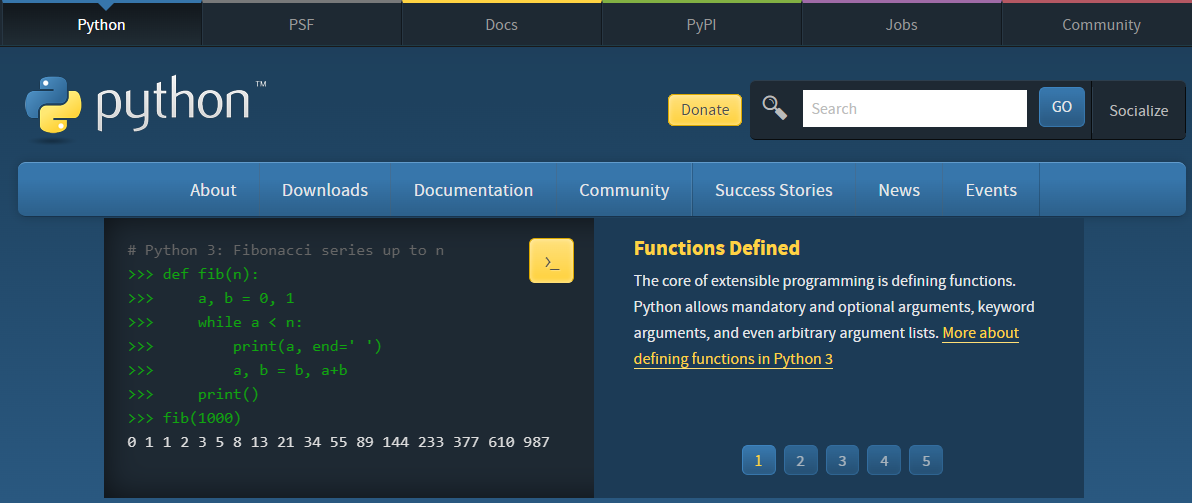
First, go to Python.org and click on the "Downloads" button to access the download page for Python.
Step 2
To download the latest Python version, go to the downloads section on the Python website by hovering your cursor over the "Downloads" tab in the navigation bar. A drop-down menu will appear, and you should click on the version of Python that is appropriate for your operating system (e.g., Windows, Linux, or macOS). Once you have selected the correct version, the download should start automatically. Be patient, as the download process may take some time depending on your internet connection speed.
Step 3
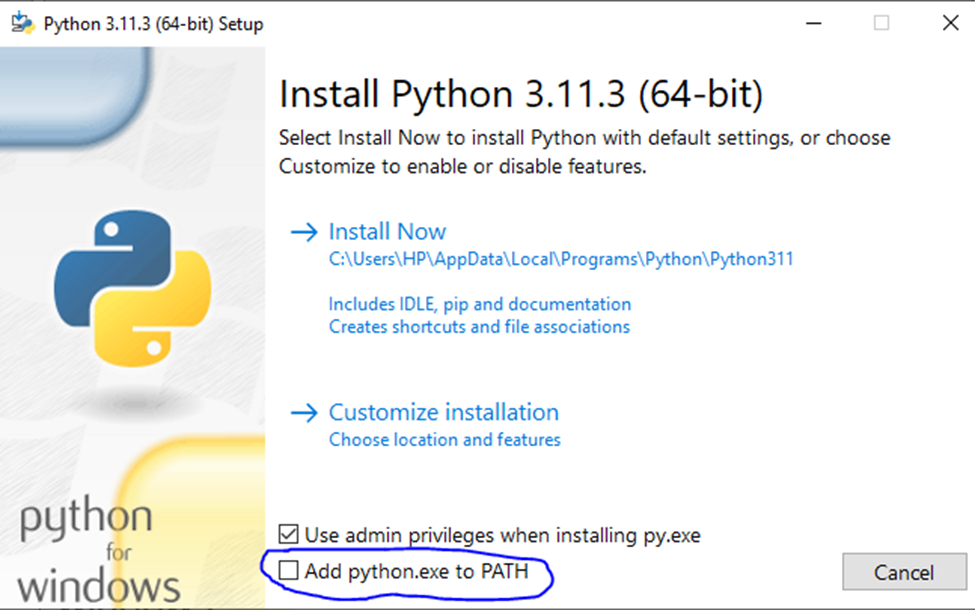
Navigate to the folder where the Python installer was downloaded. This is usually your default downloads folder or the folder you specified during the download. Double-click on the downloaded Python installer file. You should be met on the below page. The following page should appear. Tick on Add.python.exe to PATH and then click on the part labeled "customize installation".
Step 4
You should be met with the Python installer window. This is where you will be able to customize your Python installation if needed. However, for most users, it is recommended to leave everything as it is and simply click on the 'Next' button.
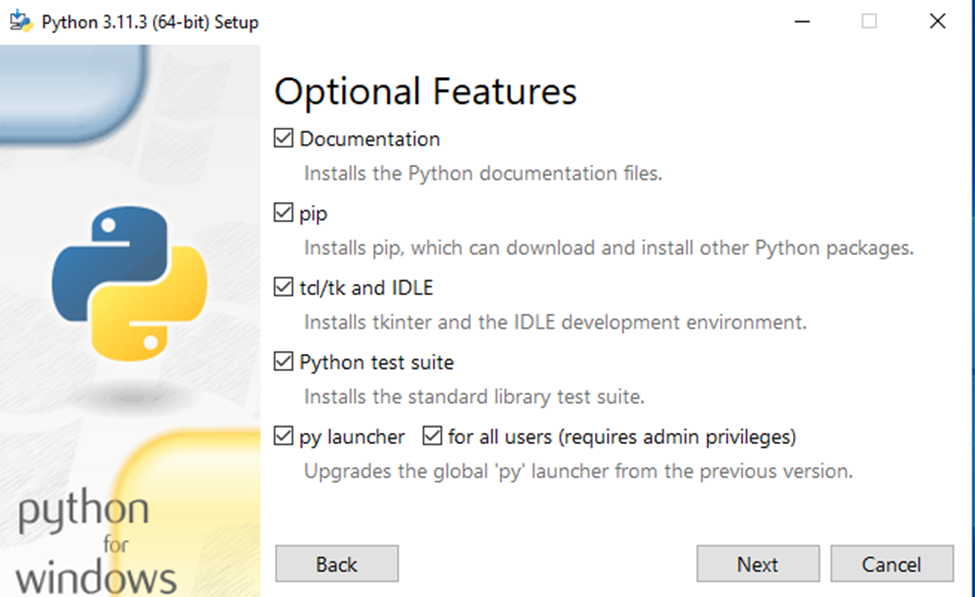
Step 5
Check the "Install for all users" option and then click on the "Install" button. Note that you can customize the installation location if you prefer, but for simplicity, we will leave it as the default option.
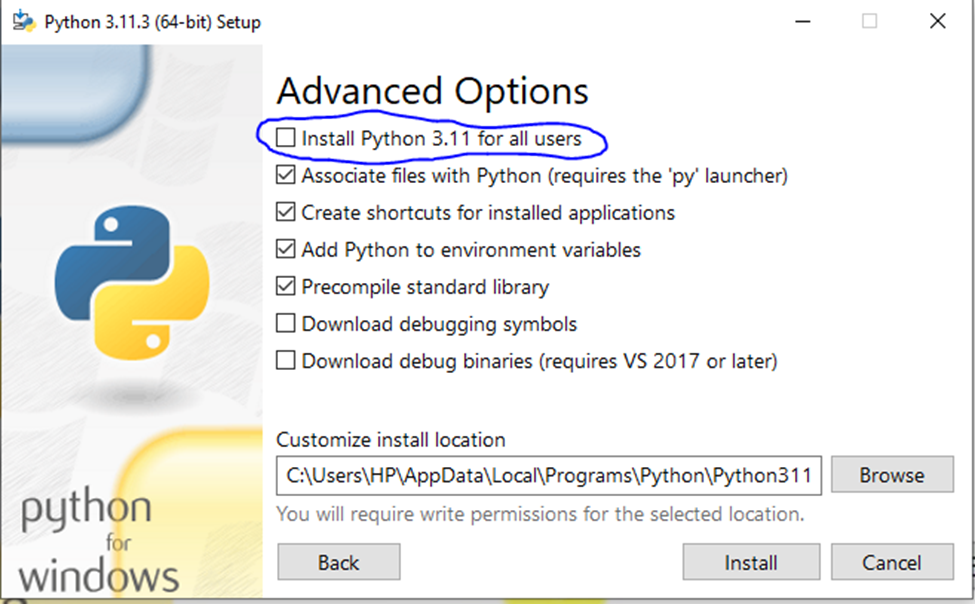
Step 6
After completing the installation, a confirmation message will appear, indicating that Python has been successfully installed on your system. You should see a message similar to the image below, which signifies that the installation process was successful.
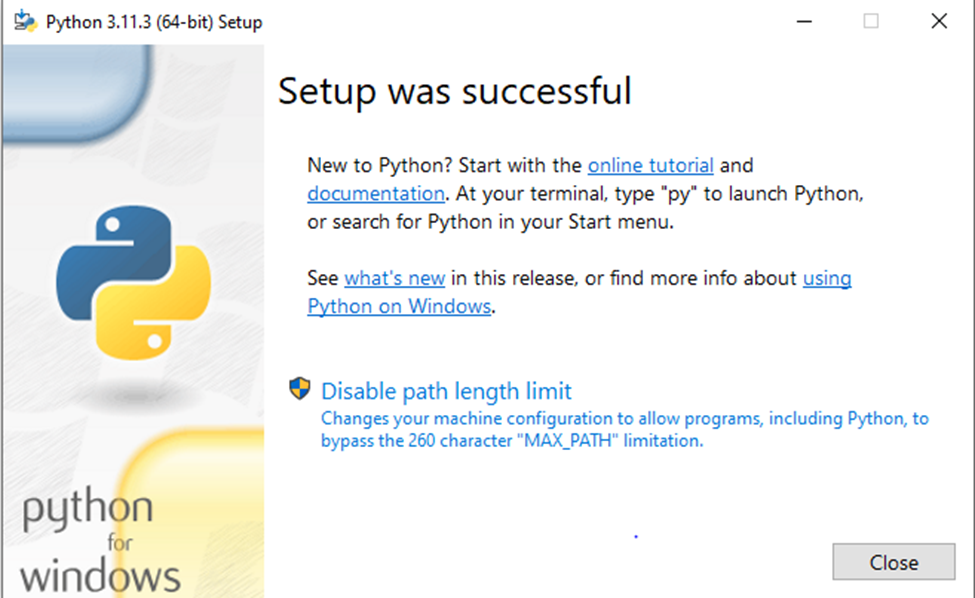
Step 7
Once you have completed the installation process, you can verify that Python has been successfully installed on your computer. To do this, open the Command Prompt on Windows or Terminal on macOS/Linux. To open the Command Prompt on Windows, press the Windows key and type "cmd" in the search bar. On macOS, you can find Terminal in the utility folder, which is located in the Applications folder. On Linux, you can typically find the Terminal by searching for it in the applications menu.
Once you have opened the Command Prompt or Terminal, type "python --version" (without quotes) and press Enter. This will display the version number of Python that is currently installed on your computer. If you see a version number displayed, then Python has been installed correctly.
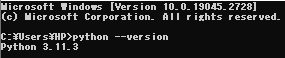
That's all for today on installing Python. In the next article, we'll explore how to download and set up Visual Studio for Python. Stay tuned!